


Why Your New Plastic Pump Underperforms:
Why Your New Plastic Pump Underperforms: A Crucial Pre-Use Step Most People Miss
Dear Valued Customer,
As a professional manufacturer of household plastic water pumps, FLOSITE pump frequently receive feedback from our distributors and end-users worldwide. A common and concerning report often sounds like this: "My customer just bought your plastic pump, and from the very first use, the performance is terrible! The flow rate and head are much lower than stated on the specifications. There must be a quality issue."
Upon detailed investigation and conversation with these customers, we almost always discover the same root cause: the pump was not properly primed (de-aired) before its initial submersion.
This is a widespread issue, but it's easily overlooked because most users are understandably not pump experts. They assume—quite logically—that a submersible pump should simply be placed in water and turned on. However, for lightweight plastic pumps, this assumption leads to a significant performance drop.
The Core of the Problem: Trapped Air
The issue is not one of quality but of physics. Unlike heavier cast iron pumps that sink rapidly, a lightweight plastic pump can initially float or submerge at an angle, trapping a large air pocket inside the pump housing and the impeller chamber. When the pump starts, this trapped air is compressed instead of water being moved. The impeller spins, but it's mostly moving air—a fluid it's not designed to handle efficiently. This phenomenon, known as "air-locking," drastically reduces the pump's ability to create suction and pressure, resulting in poor flow and lower-than-expected head.
The Simple, Essential Solution: Manual Exhaustion (Priming)
The solution is straightforward and takes only a moment but makes all the difference. Before connecting the pump to power, you must manually exhaust the air from the pump. Here is the correct procedure:
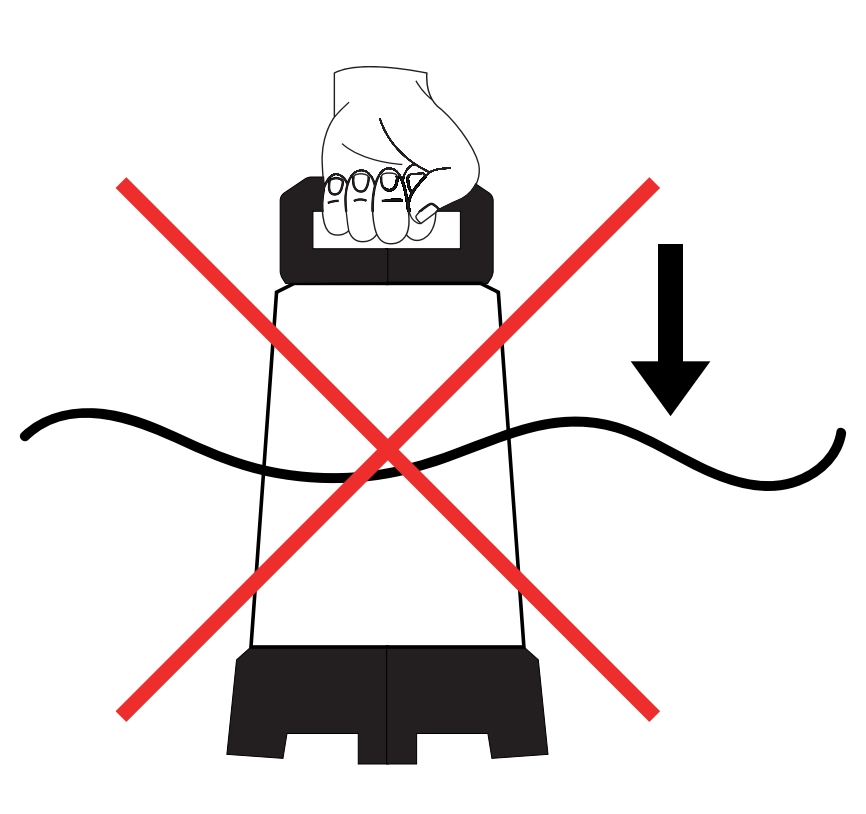
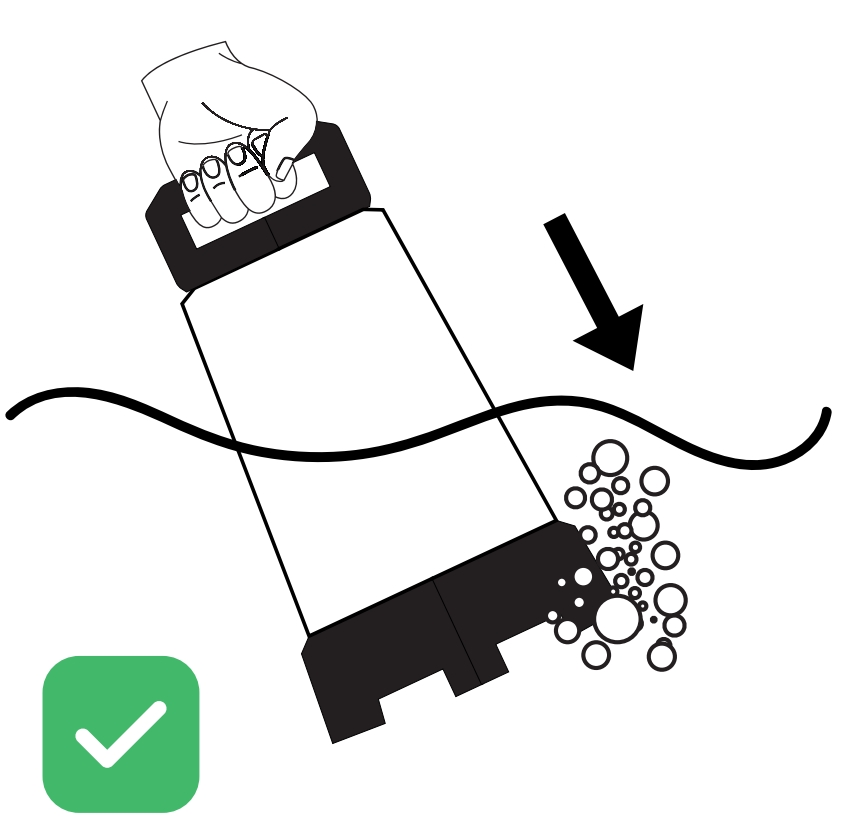
1. Submerge Slowly at an Angle: Do not simply drop the pump straight into the water. Instead, slowly lower the pump into your water source (a tank, pool, or well) at a 45-degree angle.
2. Allow Water to Enter: Hold the pump in this tilted position for 10-15 seconds. You will see air bubbles escaping from the pump's outlet and intake areas. This is the air being displaced by water.
3. Complete Submersion: Once the bubbling significantly reduces or stops, the pump is primed. You can then gently lower it to its normal operating position, fully submerged.
4. Begin Operation: Now, you can plug in the pump or switch it on. It will start with a fully water-filled cavity, allowing the impeller to work on the dense fluid it's designed for, delivering its full, rated performance immediately.
Our Commitment to Your Success
To help prevent this issue, our factory now attaches a clear reminder label directly on every plastic submersible pump we produce(mainly used on 250w-550w), illustrating the correct angled-submersion technique. We believe that informed users have the best experience. By following this simple priming step, you ensure that your pump operates at peak efficiency from the very first use, providing the reliable service you expect.
Should you have any further questions, please do not hesitate to contact our support team.
Best regards,
The FLOSITE Pump Team
-
The Rainy Season is Coming – Is Your Drainage Pump Ready?
– Is Your Drainage Pump Ready?
넶4 2026-05-27 -
2025 Global Pump Industry Sales Ranking: Key Players & Market Trends
Key Players & Market Trends
넶11 2026-05-12 -

Celebrating Labour Day: The Fluid That Moves the World
The Fluid That Moves the World
넶18 2026-04-30 -

New Opportunities for the Pump Industry in the AI Era
The Liquid Cooling Pump & Valve Market Takes Off
넶22 2026-04-24


